It’s pretty common to have to transfer a song written in Logic into Pro Tools for a client to mix (or remix). Here’s how to do it as fast as possible with the least amount of hassle.
Audio Files Only
If all you need to supply is audio files for transferring to Pro Tools (usually the most common requirement), it’s a very easy 5 steps (MIDI files are trickier – we’ll get to those later).
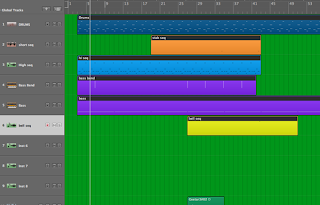
All files will start at the same point and be as long as they need to be.
Files won’t include any Bus/Aux effects, only what’s on each Channel Strip.
Files are PRE-fade (ie the equivalent of the fader being at 0.0), so they may be quite loud.
1. Name your Logic tracks intelligently (double click on the track header to give it a useful name – this is what your file will be named)
2. Make sure the length of your song is set to about the right length -ie not 200 bars if it’s only 20 bars long. It’s no biggie if you forget this one, but you’ll be sitting waiting for longer than you need to while waiting for the files to bounce.
3. Delete any unused tracks and/or mute unwanted regions.
4. Select menu File-Export-“All Tracks as Audio Files”.

5. Select Wave and 24 bit (unless something else is desired). Select Normalize “Overload Protection Only” (this is not your typical “normalize” function and will just make sure your Channel Strip level will never overload). Make sure you know where you’re bouncing to. The default is the “bounce” folder within same session. (You don’t have to enter any file name/s). Hit “Save”. All done.
MIDI File Export
Exporting MIDI tracks as MIDI files is a bit fiddlier than creating audio bounces, as many of the processes in Logic such as region Quantise and Transpose are “real-time” and need to be rendered into the MIDI track itself before exporting as a Standard MIDI File.
Do this (assumes standard Logic key commands):
1. Select all MIDI regions you’re going to export as a file.
2. Press “Control N” (normalises any region parameters for the selected regions – eg Transpose).
3. Press “Control Q” (normalises any Quantize parameters for the selected regions).
4. Press “Control L” (turns any loops into copies).
5. Press “Shift =” (merges the copies and other regions into a solid file on each track).
6. Name each region with the text tool (you’ll thank me later).
7. Select menu; File-Export-“Selection as MIDI file”. Name your file (eg blah.mid), hit Save and you’re done.
Now to bring these shiny new audio or MIDI files into Pro Tools.
The easiest way is to create a new, empty Pro Tools session, then drag your files directly from the “bounce” folder in Finder and drop them into the empty Edit window in Pro Tools. PT will now import the files and automatically create the appropriate track for each file.

